|
PCB Etching
The things you will need to UV etch your first board:
Buy from Maplins:
- Ferric
Chloride (PCB Etch Powder) (Etching)
- BC
Compact UV Lamp L16AN - 11 watts
- Pre-Sensitised
Copper-Clad Board
- Etching
tray
From a Chemist
- Sodium Hydroxide (Developer)
Find around the house:
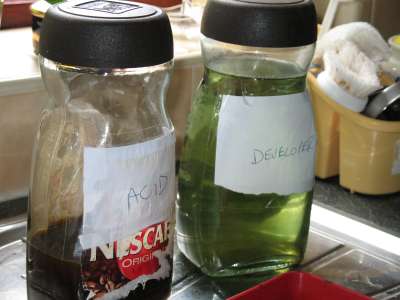
- 2 x Coffee jars
- A piece of glass - strip a photo frame
- Anglepoise lamp
- Rubber washing up gloves
- Old board to protect worktop
Board design:
- Design your board to scale and print onto a piece Overhead Projector
slide
What to do:
- Remove the protective film from the photo sensitive PCB and place
it on the old board to protect the worktop
- Place your OHP Acetate slide, the right way round, onto the PCB
- Place the glass on top.
- Fit the UV bulb into the anglepoise
- Celotape some A4 paper around the anglepoise to contain the UV light
- With the anglepoise about 75mm above the PCB, switch on and expose.
- How long to expose for depends on the photo speed of the board. I've
had exposures of 3 minutes and 20 minutes with different board types.
Etching the board:
- Put on the washing up gloves and do this over the kitchen sink.
While the PCB is being exposed mix up the developer (Sodium Hydroxide)
and the etching solutions (Ferric Chloride) into the two coffee jars.
You mix together 0.5l of water with one teaspoonful of sodium hydroxide.
Mix 100g of Ferric Chloride with 0.5l water. For best results use
hot water for the etching solution.

- Once the PCB is ready. Use the tongs provided and lower the PCB
into the developer until you can see the circuit appear. Wash the
pcb in fresh water.
- Put the hot etching solution into the tray provided. Drop in the
PCB with the tongs and then slowly rock the tray to move the solution
over the PCB. This will take some time but eventually the exposed
copper is etched away revealing the PCB board.
- Wash the PCB in fresh water and there's your board.
- Finally, clean up and wash down the sink!
|